
Mastering Skin Smoothing in Lightroom: A Step-by-Step Guide
Adobe Lightroom Mod is a powerful tool for photographers, both beginners and professionals, offering a range of editing capabilities to enhance photos. One of the most popular techniques is skin smoothing, which helps to create polished portraits with smooth, glowing skin. In this guide, we’ll explore the best methods to achieve smooth skin in Lightroom, using its essential tools and settings.
Why Smooth Skin?
Smooth Skin:
Smoothing skin is a crucial part of portrait editing. While capturing perfect skin is nearly impossible, Lightroom helps refine and enhance portraits, giving the skin a radiant appearance. However, achieving a balanced effect is key. Over-editing can lead to unnatural results, so the goal is to maintain a smooth yet natural look that highlights the beauty of the skin without losing texture.
Essential Tools for Smoothing Skin in Lightroom
Smoothing Skin
Adjustment Brush
The Adjustment Brush is the most essential tool for targeted skin smoothing. It allows you to paint over specific areas of the skin that need enhancement, leaving other areas untouched. This gives you full control over which parts of the image you want to smooth.
How to Use: Set the brush size according to the area you’re editing, then feather the edges for seamless blending. Avoid areas like the eyes and lips to maintain natural sharpness.
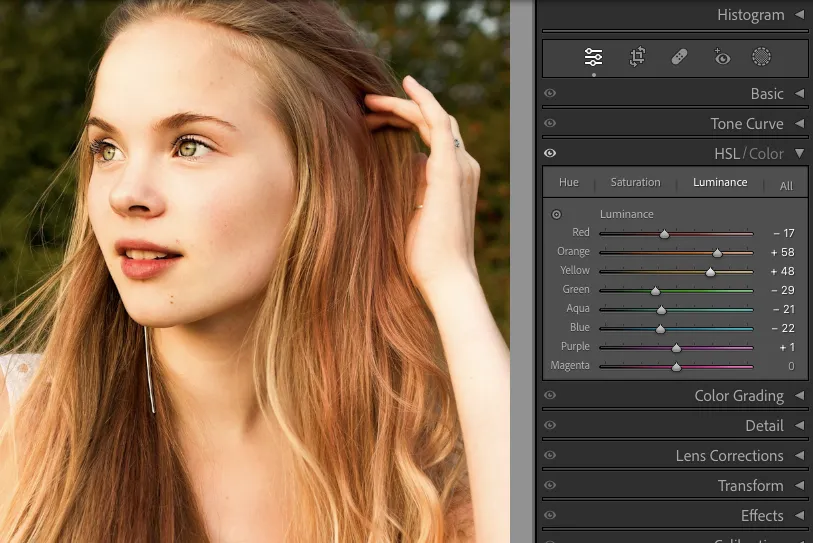
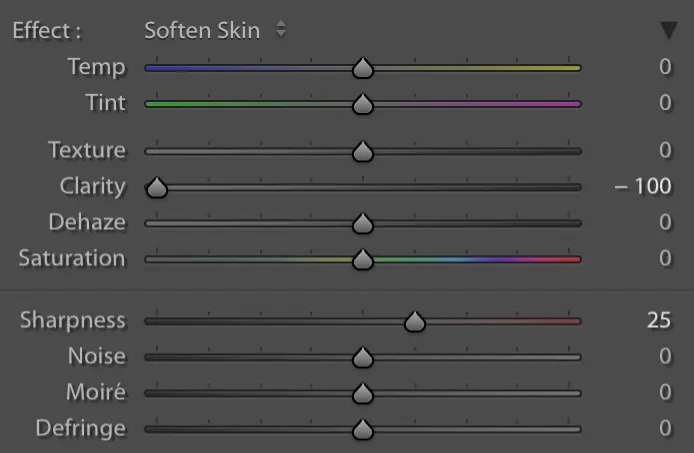
Clarity and Texture Sliders
Clarity and Texture sliders play an important role in controlling skin texture:
Clarity: Reducing clarity (usually between -40 to -60) softens the skin’s texture by reducing midtone contrast.
Texture: This slider is crucial for fine-tuning skin. Lowering it slightly (around -10 to -20) softens the skin without blurring vital details like pores or fine lines.
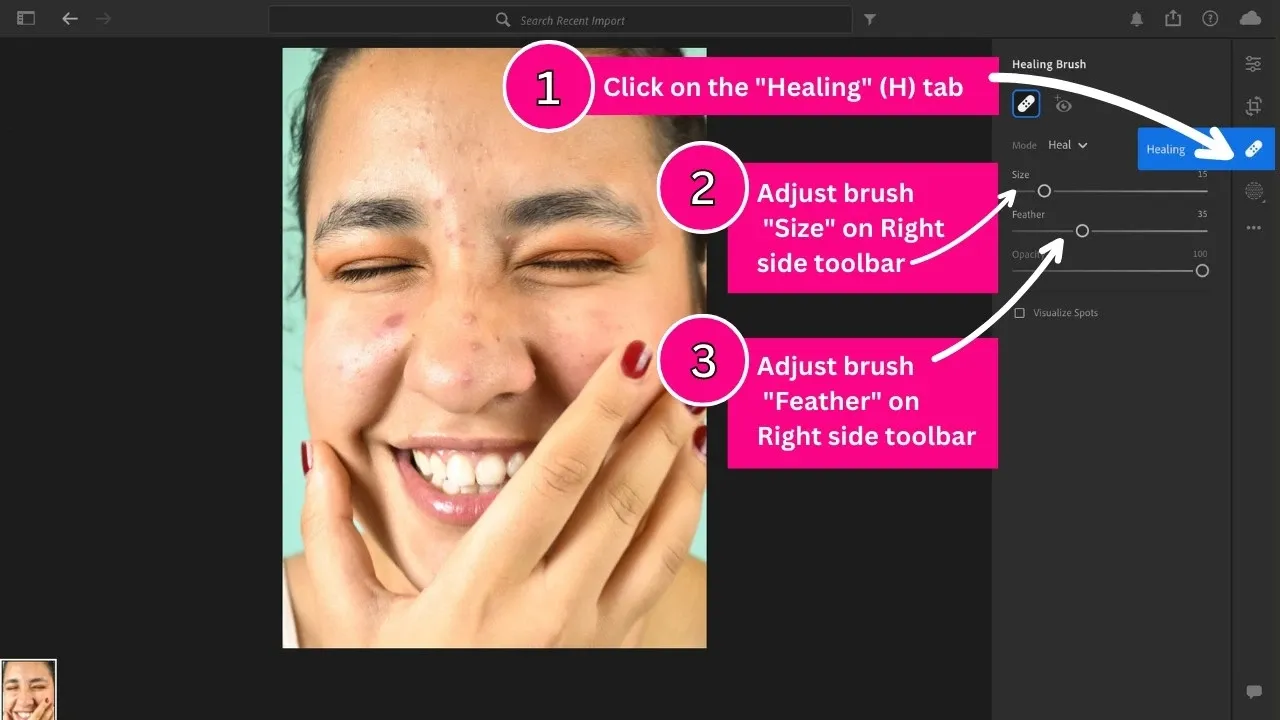
Spot Removal Tool
To remove blemishes, acne, or other skin imperfections, the Spot Removal tool is indispensable. This tool helps to seamlessly blend the skin by healing or cloning areas with imperfections.
How to Use: Zoom in and carefully apply the tool to areas with blemishes. Choose the Heal option for better blending with surrounding skin.
Dehaze Slider
While primarily used for reducing haze in photos, the Dehaze slider can also add a soft glow to the skin. Combined with exposure adjustments, this can enhance the skin’s overall tone and make it look more radiant.
Step-by-Step Guide to Smoothing Skin in Lightroom
Import and Select Your Photo
Basic Adjustments
Before diving into skin smoothing, make the following basic adjustments:
Using the Adjustment Brush for Skin Smoothing
Spot Removal
Refining the Effect
Final Touches
Advanced Tips for Professional Results
Custom Presets
If you regularly use the same settings, creating Custom Presets for skin smoothing can save time. Simply save your favorite settings and apply them to future photos.
Using Radial and Graduated Filters
These filters are perfect for targeting specific areas of the face (e.g., cheeks or forehead) for more refined skin smoothing.
Maintaining Natural Skin Texture
While smoothing, it’s essential to preserve the skin’s natural texture. Avoid over-smoothing, as it can make the skin look unnatural. Always adjust sliders subtly and test the changes to ensure authenticity.
Pros and Cons of Skin Smoothing in Lightroom
pros
Cons
Quick Navigation
| 5 Easy Ways to Add Watermarks in Lightroom: Complete Guide | https://lightrm.pro/watermarks/ |
| Quick Steps to Effectively Blur Backgrounds in Lightroom | https://lightrm.pro/blur-backgrounds/ |
Frequently Asked Questions
Conclusion
Smoothing skin in Lightroom is a powerful way to enhance your portraits and give them a professional, polished finish. With tools like the Adjustment Brush, Clarity, Texture, and Spot Removal, you can achieve smooth, glowing skin while maintaining a natural look. Whether you’re a beginner or a seasoned photographer, mastering skin smoothing in Lightroom will elevate your photo editing skills and take your portraits to the next level.