5 Easy Ways to Add Watermarks in Lightroom: Complete Guide

In today’s digital age, safeguarding your photography and videography is more crucial than ever. Watermarking not only protects your work from unauthorized use but also helps in building your personal or business brand. In this guide, we’ll cover all the methods to add watermarks in Lightroom Mod across various platforms, ensuring your images remain secure while promoting your identity.

Add Watermarks

Why Add a Watermark?

Watermarking your images in Lightroom serves two main purposes:

  • Branding: It marks your work with a unique identifier, allowing viewers to easily associate the work with you.
  • Protection: It discourages unauthorized use of your work, ensuring your content isn’t stolen or misused.

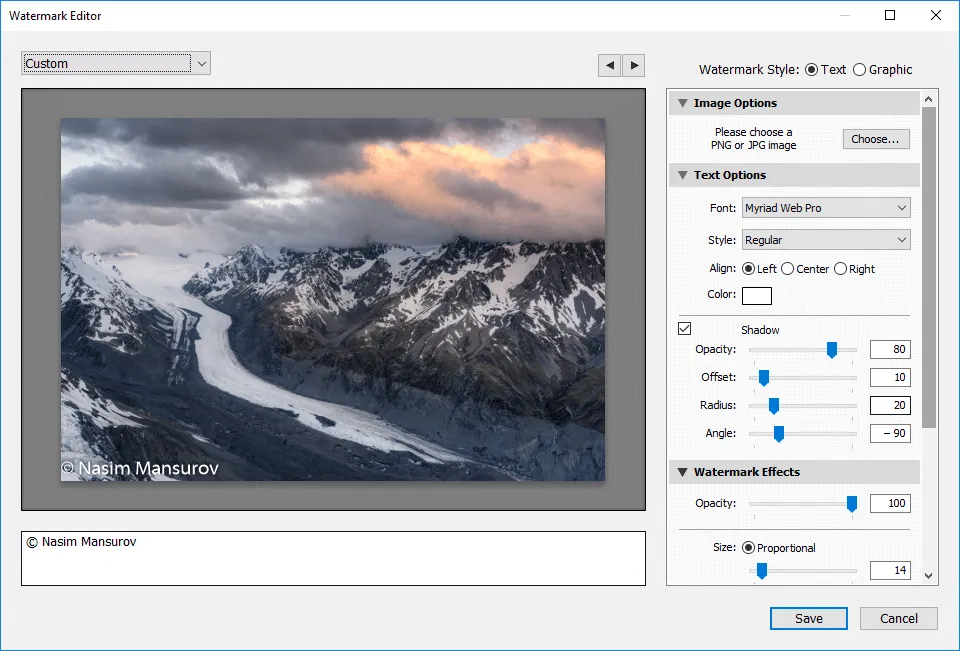
Watermark Types in Lightroom

Lightroom offers two primary watermark types:

  • Text Watermark: A simple way to brand your images with your name, copyright, or social media handle.
  • Graphic Watermark: This involves using a logo or custom graphic, ideal for professional photographers or businesses aiming to promote their brand.

Both types of watermarks offer customization in terms of font, color, opacity, and positioning, allowing you to create a watermark that fits your style.

How to Add a Watermark in Lightroom Classic (Desktop)

Accessing Watermark Settings

  • Open Lightroom and navigate to the photo or video you want to watermark.
  • Once you’re ready to export, click on the Export button.
  • In the Export settings, locate the Watermark section and ensure the watermark option is enabled.

Choose Your Watermark Style

  • Text Watermark: Select the text option, and type your watermark text (e.g., your name or business).
  • Graphic Watermark: If you prefer a logo, upload your logo as a PNG file with a transparent background for best results.

Chatbot Pintar:

  • Text Watermark: Customize the font, size, color, and opacity. Adjust the position to place it where it’s visible yet unobtrusive.
  • Graphic Watermark: Resize and position your logo, adjusting the opacity to make it subtle yet distinguishable.

Save and Export

  • Once satisfied with the watermark’s design, Save the settings as a preset for future use and export your photo.

How to Add a Watermark in Lightroom Mobile (iOS/Android)

1

Export Your Photo
Open Lightroom and select the photo or video you want to watermark.
Tap the Export button in the top right corner of the app.

2

Enable Watermark
Under Export as, enable the Include Watermark option.
Customize the watermark settings to choose between text or graphic watermark, adjusting the position and opacity as needed.

3

Finalize and Export
Once you’ve customized your watermark, tap Export to save the watermarked image or video to your device.

watermarking

Tips for Effective Watermarking

Opacity: Set the watermark’s opacity between 30-50% to ensure it’s visible without distracting from the content.

Positioning: Place the watermark in a corner or along the edge to avoid obscuring the main subject.

Consistency: Use the same watermark across all your work for brand consistency, making it easier for people to recognize your content.

Bulk Watermarking

watermark

Watermarking:

Lightroom allows you to apply the same watermark to multiple photos or videos at once. Simply select all the images you want to watermark, and Lightroom will automatically apply the watermark during export.

Pros and Cons of Watermarking in Lightroom

pros

  • Brand Recognition: Watermarking increases visibility and establishes brand identity.
  • Protection from Theft: It acts as a deterrent for unauthorized use of your photos and videos.
  • Customization: Lightroom provides various customization options, such as opacity, size, and position.
  • Bulk Processing: Easily apply the same watermark to multiple photos at once.
  • Professional Appearance: A well-designed watermark enhances the perceived professionalism of your work.

Cons

  • Intrusiveness: A poorly placed or opaque watermark can distract from the photo’s main content.
  • Time-Consuming for Large Projects: While Lightroom allows bulk watermarking, the process can still be time-consuming for large image libraries.
  • Loss of Image Quality: Watermarks, especially when applied with high opacity, can sometimes degrade the visual quality of the image.
  • Not Always Effective for High-Quality Images: If a watermark is placed in an easy-to-remove area or is too faint, it can be easily bypassed by those trying to steal the image.

Quick Navigation

5 Easy Steps to Download Adobe Lightroom for PC (2025)https://lightrm.pro/pc/
Lightroom Presets: Complete Guide to Download and Usehttps://lightrm.pro/download/

Frequently Asked Questions5

You can easily create a logo watermark by designing it in graphic design software like Canva or Photoshop. Once created, save the logo as a PNG file with a transparent background, and upload it into Lightroom.

Yes, Lightroom allows you to add watermarks to both images and videos, providing consistency across all types of media.

Yes, Lightroom’s bulk export feature allows you to apply the same watermark to multiple photos or videos during the export process, saving time.

Yes, you can edit your watermark settings (e.g., text, position, opacity) by accessing the Edit Watermarks option in the Export dialog box.

After selecting your watermark (text or graphic), you can adjust the opacity using the Opacity slider in Lightroom’s watermark editor. This allows for a subtle, non-intrusive watermark effect.

Yes, Lightroom allows you to create multiple watermark presets, making it easy to apply different watermarks to different images or video sets.

After creating a watermark, click Save in the watermark editor and give it a descriptive name. This way, you can easily select and apply the same watermark in future edits.

Conclusion


Adding a watermark in Lightroom is a simple yet essential step in protecting your digital creations. Whether you’re a professional photographer or a casual content creator, watermarking ensures that your work is protected while enhancing your brand presence. Follow the steps above to create and apply your watermark, and use Lightroom’s powerful features to safeguard and promote your creative work.

Similar Posts

Leave a Reply

Your email address will not be published. Required fields are marked *